Address
Nanlang Industrial Zone, Xingtan Town, Shunde District, Foshan, Guangdong, China
Work Hours
Mon–Fri, 9:00 AM – 6:00 PM (CST/UTC+8). We aim to respond to all inquiries within 48 hours.

Address
Nanlang Industrial Zone, Xingtan Town, Shunde District, Foshan, Guangdong, China
Work Hours
Mon–Fri, 9:00 AM – 6:00 PM (CST/UTC+8). We aim to respond to all inquiries within 48 hours.
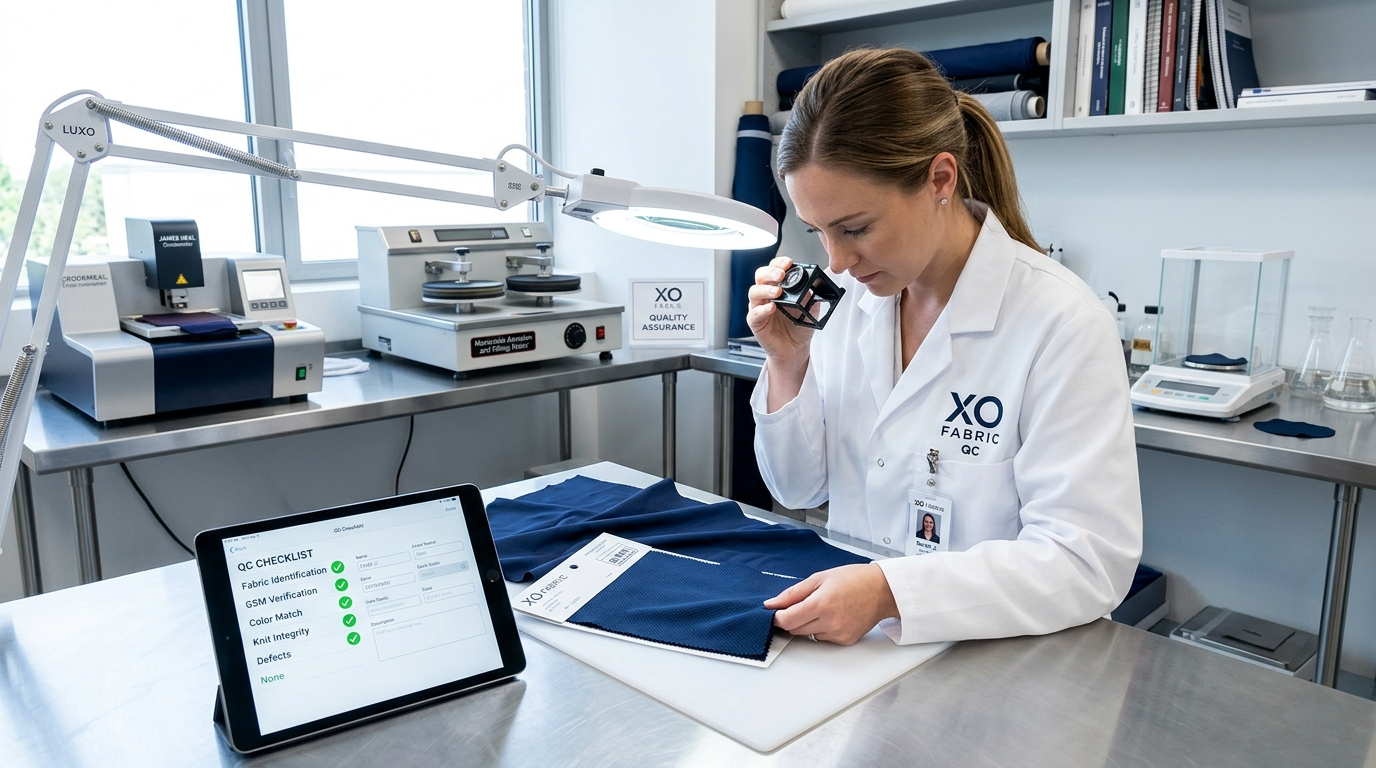
You’ve waited weeks for your fabric shipment. It arrives, and suddenly 20% of the rolls show oil stains or the color is just… off. A proper fabric quality control checklist would have caught this before it reached your cutting table.
Many new apparel brands skip systematic QC, only to face costly returns and production delays later. Quality control at shipment isn’t bureaucracy—it’s your first line of defense against defective fabrics entering your production line. This guide walks through a practical QC checklist for fabric shipments, with real-world insights on what to check, when, and how to respond when things don’t match expectations.
Let’s be honest: skipping QC feels like saving time. Until it doesn’t. When defective fabric slips into production, the ripple effects are expensive. Garment defects lead to customer returns. Replacing fabric means air freight costs and missed deadlines. I’ve seen a single batch of inconsistent dye lot delay a whole collection launch by three weeks.
Who should perform QC? Options include factory self-inspection (common with integrated producers), third-party services like SGS or Intertek, or your own team inspecting upon receipt. Each has trade-offs. Factory QC is fast but may lack objectivity. Third-party adds credibility but costs $200-500 per visit. Your own inspection gives control but requires travel or logistics.
Timing matters too. Catching issues during production (in-process) is ideal—less waste, easier fixes. Final inspection before shipment prevents bad goods from leaving the factory. And a receipt check on your end creates a paper trail if issues arise later. For a deeper look at systematic approaches, see our XO Fabric Quality Control Process guide.
One thing I’ve learned: transparency saves headaches. If you need documentation to verify quality standards, you can Request QC Documentation directly from your supplier. Don’t assume—ask.
This is where theory meets the warehouse floor. A pre-shipment checklist turns vague “check quality” into actionable steps. I keep a printed version handy during receiving—it’s easy to skip a step when you’re tired or rushing.
Start with your eyes. Compare fabric color to the approved lab dip under D65 lighting if possible. Metamerism can trick you under store lighting. Scan for surface defects: oil stains, slubs, or yarn breaks. Check edges for curling or fraying—these affect cutting efficiency. A quick roll-through on an inspection table reveals issues bulk packaging hides.
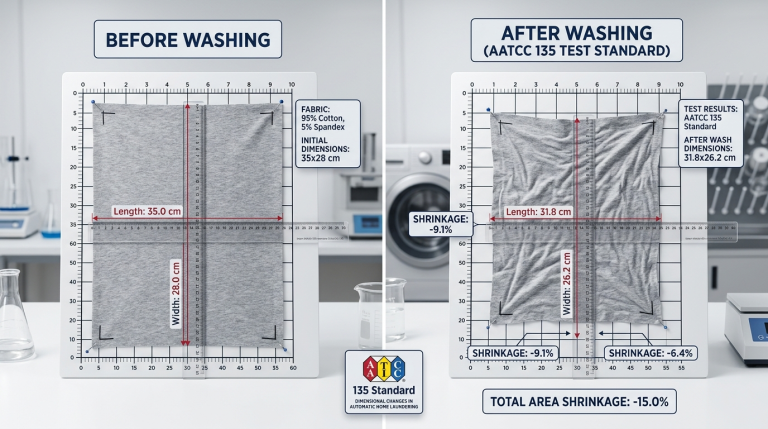
Physical testing doesn’t require a full lab. Pull a sample from the shipment’s middle roll, not just the top. Check GSM with a simple scale and cutter; ±3% tolerance is standard for knits. For shrinkage, a quick AATCC 135 wash test on a 10x10cm swatch tells you if pre-washing is essential. If you’re unsure how to interpret results, our guide on How to Read Fabric Lab Report breaks down common metrics.
Packaging isn’t just about protection—it’s data. Rolls should be wrapped in plastic with sturdy cardboard cores to prevent crushing. Labels must show fabric type, GSM, color name, and dye lot number. Missing dye lot info? That’s a red flag for future reorders. Shipping marks should match your purchase order exactly.
Documentation check is quick but critical. Verify the packing list against received roll count and yardage. Cross-check invoice details: fabric composition, price, payment terms. If test reports were promised, ensure they’re included. Shrinkage is a common pain point—our Fabric Shrinkage explainer helps set realistic expectations.
Quick Pre-Shipment Checklist Table
| Check Item | Acceptable Standard | Tool/Method |
| Color consistency | Matches approved lab dip under D65 | Light box or natural daylight |
| Surface defects | ≤3 minor defects per 10 linear yards | Visual inspection on backlit table |
| Fabric weight (GSM) | ±3% of spec | GSM cutter + precision scale |
| Shrinkage | ≤5% length/width after wash | AATCC 135 test swatch |
| Label accuracy | 100% match to PO | Physical label audit |
What if you find issues? Document immediately with photos showing scale (a ruler next to the defect helps). Note roll numbers and dye lots. Contact your supplier within 48 hours—delays weaken your position. Most reputable mills will investigate promptly. I once had a supplier replace a defective batch within a week because we sent clear photos and kept the original packaging intact.
Pre-shipment checks catch problems, but in-process QC prevents them. This is where integrated production shines. When knitting, dyeing, and finishing happen under one roof, technicians can adjust in real-time. Trading companies often can’t offer this visibility.
At the knitting stage, yarn quality sets the foundation. Technicians monitor stitch density and tension. Broken yarns create holes or thin spots. I prefer mills that use electronic yarn monitors—they stop machines instantly when issues arise. Real-time data beats post-production discovery.
Color matching during dyeing is critical. Comparing to lab dips under multiple light sources catches metamerism early. Dye uniformity checks prevent streaks or blotches. In finishing, width consistency affects yield. Hand feel tests ensure softness or stiffness matches specs. Functional finishes like moisture-wicking need verification too.
One project taught me this the hard way: we ordered a technical knit for activewear. The lab dip looked perfect, but bulk dyeing ran slightly warm, altering the hand feel. Because the mill monitored in-process, they adjusted the finishing bath and saved the batch. That’s why Color Matching protocols matter beyond just the initial approval. You can browse our All Products to see examples of fabrics with documented in-process QC.
Troubleshooting Common In-Process Issues
I’ll admit: I sometimes prioritize speed over in-process checks when deadlines loom. Rarely a good call. The hour saved upfront often costs days in rework.
Third-party inspections add objectivity, especially for high-value orders or new suppliers. If you can’t visit the factory yourself, an independent inspector becomes your eyes on the ground. I use them when order values exceed $10k or when trying a new mill for the first time.
How it works: Book an inspector 1-2 weeks pre-shipment. They follow AQL (Acceptance Quality Limit) sampling standards—typically ISO 2859-1. For fabric, AQL 2.5 for major defects, 4.0 for minor is common. The inspector checks random rolls, documents findings, and issues a report. This report can be leverage in negotiations if issues arise.
Costs range $200-500 depending on order size and location. Some suppliers, like the one I work with regularly, will arrange and partially subsidize third-party checks for trusted clients. If you need help coordinating this, you can Request Samples and inspection support through their team. Also, negotiating inspection terms upfront is part of broader supplier discussions—our guide on Negotiating with Chinese Suppliers covers this.
One caveat: third-party reports aren’t infallible. Inspectors sample; they don’t check every yard. I once had a report pass a shipment, only to find edge defects in the inner layers of rolls. Now I always pair third-party checks with my own receipt inspection. Redundancy isn’t paranoia—it’s risk management.
Despite best efforts, issues happen. The key is systematic response. First, document everything. Photos with a ruler or color card for scale. Keep defective swatches. Note roll numbers, dye lots, and exact defect locations. This isn’t just for claims—it helps diagnose root causes.
Contact your supplier promptly, ideally within 7 days of receipt. Provide your documentation clearly. Reputable mills respond within 24 hours. If you’re dealing with delays from quality issues, our Managing Lead Time Delays guide offers mitigation strategies. And if you need to escalate, you can Report Quality Issues directly to their team.
Negotiating solutions requires clarity on your priorities. Replacement fabric works if timelines allow. Partial refunds let you use marginally defective fabric for less critical items. Full returns are last resort due to shipping costs. I prefer partial refunds when defects are localized—it keeps production moving while compensating for yield loss.
Decision Framework for Quality Issues
| Issue Severity | Recommended Action | Timeline Impact |
| Minor (cosmetic, <5% of batch) | Partial refund + use in less visible garment areas | Minimal |
| Moderate (affects function, 5-15%) | Replacement for affected rolls + discount on next order | 1-2 weeks |
| Major (safety/compliance, >15%) | Full return + expedited replacement via air freight | 3-4 weeks |
A personal note: I once accepted a partial refund for fabric with slight shade variation. We used it for lining pieces where consistency mattered less. The client never noticed, and we avoided a two-week delay. Sometimes perfect is the enemy of shipped.
After years of sourcing, I prioritize suppliers with transparent, multi-stage QC. The mill I partner with employs 50+ technicians for in-process checks—knitting, dyeing, finishing. This integrated approach means issues get caught early, not at final inspection. Consistency across batches matters more than one-off perfection.
Documentation builds trust. Test reports for GSM, shrinkage, color fastness, and pilling should accompany shipments. I always request these, even if not initially offered. Transparency about testing methods (AATCC vs. ISO) prevents misunderstandings later.
The integrated production model—knitting, dyeing, finishing in-house—eliminates finger-pointing between vendors. When a hand feel issue arose last year, the mill’s team traced it to a finishing bath pH shift and corrected it within hours. No third-party delays. You can explore their All Products to see the range of quality-controlled options. If you’re ready to discuss specific needs, Contact Us to start a conversation.
I’ll be candid: no supplier is perfect. But a partner who investigates issues promptly and offers fair resolutions—replacement or refund, your choice—makes sourcing less stressful. That’s the standard I expect.
Quality control for fabric shipments isn’t about finding fault—it’s about building confidence. A systematic checklist (visual checks, physical tests, documentation review) creates a safety net for your production. The real value isn’t just rejecting bad fabric; it’s the data you gather to improve future orders.
Start simple: a one-page checklist for receipt inspection. Add in-process checks as you build supplier relationships. Use third-party inspections for high-stakes orders. And always document—photos and notes turn subjective complaints into actionable feedback.
At the end of the day, consistent quality comes from partnership, not policing. When your supplier shares your commitment to getting it right, QC becomes collaborative problem-solving, not adversarial inspection. That shift changes everything. If you’re looking to streamline this process, Contact XO Fabric to discuss how structured QC can support your next collection.